How to Grow Your Sausage Best Meats, Grinders & Cleavers
Equip the trio after the 1.0 item wave—demo staples may slip tiers after the full rebalance.
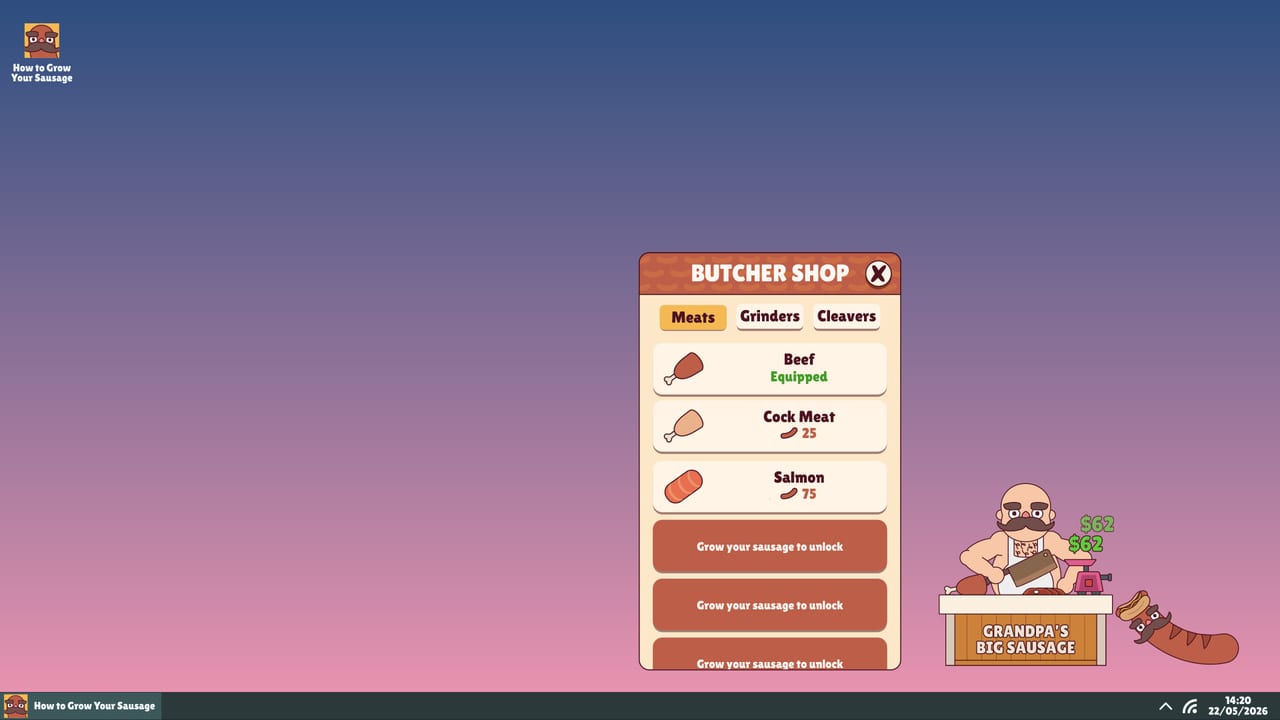
Items in How to Grow Your Sausage are not one-off collectibles you park forever. Official store text tells you to purchase and equip different types of meats, grinders, and cleavers so the sausage grows faster. This tier list ranks those three slots for idle efficiency, explains when to swap, and points you back to Best Upgrades whenever money should leave the item shop for process upgrades—or toward the Prestige Planner when a reset is the real upgrade.
New butchers: finish Getting Started, then return here once the shop shows multiple equip options. For ranking rules, see the Tier List Hub.
The three-slot mental model
Think of a simple pipeline:
- Meat — what you feed; flavour of growth input.
- Grinder — how that meat is processed into sausage fuel.
- Cleaver — how the butcher converts your PC interactions into slices/feeds.
A strong cleaver with weak meat wastes motion. Fancy meat through a sluggish grinder stalls. Balanced trios beat a single S-tier flex piece surrounded by C-tier placeholders.
+21 items / rebalance caution: 1.0 added about 21 new items and completely rebalanced gameplay versus the Next Fest demo. Demo-era staple meats, grinders, or cleavers may no longer sit in the same tier—re-test loadouts on a launch save. Because exact item names and hidden multipliers are not fully published as a community spreadsheet, we rank archetypes and behaviours. When you unlock a new piece, ask which bottleneck it attacks—input quality, process rate, or interaction conversion—before equipping it out of novelty.
Meats tier (feed quality)
| Tier | Meat archetype | Notes |
|---|---|---|
| S | Staple meats that boost baseline growth during AFK and light activity | Your default desk companion food. |
| A | Specialty meats that spike during heavy typing/click sessions | Swap in for work sprints; swap out overnight if they underperform idle. |
| B | Situational or unlock-gated meats with narrow windows | Keep owned; equip when a challenge or unlock demands. |
| C | Novelty / joke meats with weak compounding | Fun for screenshots; not your economy. |
Equip tip: if growth feels flat after an upgrade binge, change meat before buying another upgrade row. Players often misread a feed problem as an upgrade problem.
Grinders tier (process rate)
| Tier | Grinder archetype | Notes |
|---|---|---|
| S | Reliable grinders that raise throughput without constant attention | Best friends of desktop idle. |
| A | High-ceiling grinders that want occasional babysitting | Great when you are already at the PC watching progress. |
| B | Mid bridges between early and prestige-era grinders | Temporary; replace on schedule. |
| C | Cosmetic-leaning or meme grinders | Equip for Photo Mode, not maths. |
Grinders are where upgrade synergy shows. If Best Upgrades just improved the meat-grinding process, re-evaluate whether your grinder still matches the new process speed. Bottlenecks move.
Cleavers tier (interaction conversion)
| Tier | Cleaver archetype | Notes |
|---|---|---|
| S | Cleavers that turn ordinary keystrokes/clicks into strong feeds | Core of the “use your PC, grow sausage” fantasy. |
| A | Controller-friendly or alternate-input cleavers | 1.0 lets the butcher slice with a controller—relevant if that is how you play. |
| B | Sidegrades with tradeoffs (burst vs sustain) | Match to session length. |
| C | Flashy cleavers with little sustain | Fashion first. |
If you mostly leave the game alone while browsing, sustain cleavers outrank burst toys. If you write code or documents all day, conversion-on-keystroke cleavers climb toward S.
Equip swap playbook
Use this loop whenever income, unlock pace, or prestige timing feels wrong:
- Identify the bottleneck. Slow unlockables? Weak money? Soft growth despite upgrades? Match the symptom to meat (input), grinder (process), or cleaver (conversion).
- Swap one slot at a time. Changing all three hides which piece helped.
- Retest for a real session. Ten minutes of your normal PC use beats staring at the shop UI.
- Revisit upgrades. If the trio is coherent and growth still lags, buy process upgrades or consider prestige—see Best Upgrades and Prestige Planner.
- Log what worked. The in-game Growth Journal and Game Stats screen help you notice patterns; the Tools Hub has checklist-style routines you can mirror offline.
Early / mid / late item priorities
Early: Unlock and equip a complete trio as soon as possible. Empty slots are worse than “okay” pieces. Prefer S-tier staples over chasing a single flashy A-tier specialty.
Mid: Start swapping for session type. Keep a “desk AFK” loadout and a “deep work typing” loadout if the shop depth supports it. Prestige currency (Golden Sausages) may unlock exclusive item lines—budget for those the way you budget exclusive upgrades.
Late: Treat the post-launch catalogue (+21 items) as a second collection pass: re-tier your favourites after the full rebalance, chase achievement-related item goals, and stop overpaying for C-tier novelty once Time Travel, World Domination framing, and deep unlockables dominate the curve. Read Launch Notes for the demo-to-1.0 item jump, and Golden Sausages before spending prestige currency on exclusives.
Items vs costumes vs upgrades
- Upgrades permanently (within a run or prestige rules) improve the process—see Best Upgrades.
- Items are the equippable multipliers you can hot-swap.
- Costumes (hats, counters, skins) are primarily presentation; mechanical bonuses, when present, are discussed on the Costumes Tier List without inventing fake named drip.
Do not spend exclusive prestige currency on fashion before your meat/grinder/cleaver trio is coherent.
Practical shopping list
Copy this into a note and tick as you go:
- Own at least one meat, one grinder, one cleaver.
- Mark your AFK default trio.
- Mark your active-typing trio (if different).
- After each major upgrade purchase, reassess the grinder slot.
- After each prestige, re-equip exclusives unlocked with Golden Sausages.
- After patches, reread this page and the Updates Hub.
Related links
- Tier List Hub
- Best Upgrades
- Costumes Tier List
- Tools Hub and Prestige Planner
- Guides Hub · Getting Started
- Official Links for Steam discussions when players datamine new item behaviours
Items are half the optimisation game. Keep the trio honest, swap with intent, and let upgrades and prestige handle the long curve.
Frequently Asked Questions
Quick answers for sausage growers.
Should I always equip the newest item?
No. Newest is not best. Equip the piece that fixes your current bottleneck—meat, grinder, or cleaver—and retest during real PC use.
How many loadouts do I need?
At least one balanced AFK trio. Add a high-activity typing loadout if specialty meats or burst cleavers clearly outperform staples while you work.
Do prestige resets unequip everything?
Expect partial progress resets; re-check exclusives bought with Golden Sausages after each prestige and run the Prestige Planner before big resets.
Can I keep my demo item loadout on 1.0?
Maybe as a starting trio, but re-test. The +21 item wave and full rebalance can move bottlenecks between meat, grinder, and cleaver.
Where do new 1.0 items fit?
Launch added about +21 items over the demo plus a full rebalance. Re-tier favourites after you unlock them; do not assume demo-era staples stay S-tier forever.